Yacht Bilge Pump Guide: Pump Placement, Backup and Testing
Review bilge-pump locations, automatic controls, discharge plumbing, alarms and routine tests with a vessel-specific maintenance checklist.
Research checked: October 15, 2026
Review bilge-pump locations, automatic controls, discharge plumbing, alarms and routine tests with a vessel-specific maintenance checklist. This guide focuses on practical decisions, vessel-specific checks and the questions to resolve before spending money or changing an onboard system. Use the manufacturer’s current manual and a qualified marine professional for installation and safety-critical work.
Understand what bilge pumps are designed to do
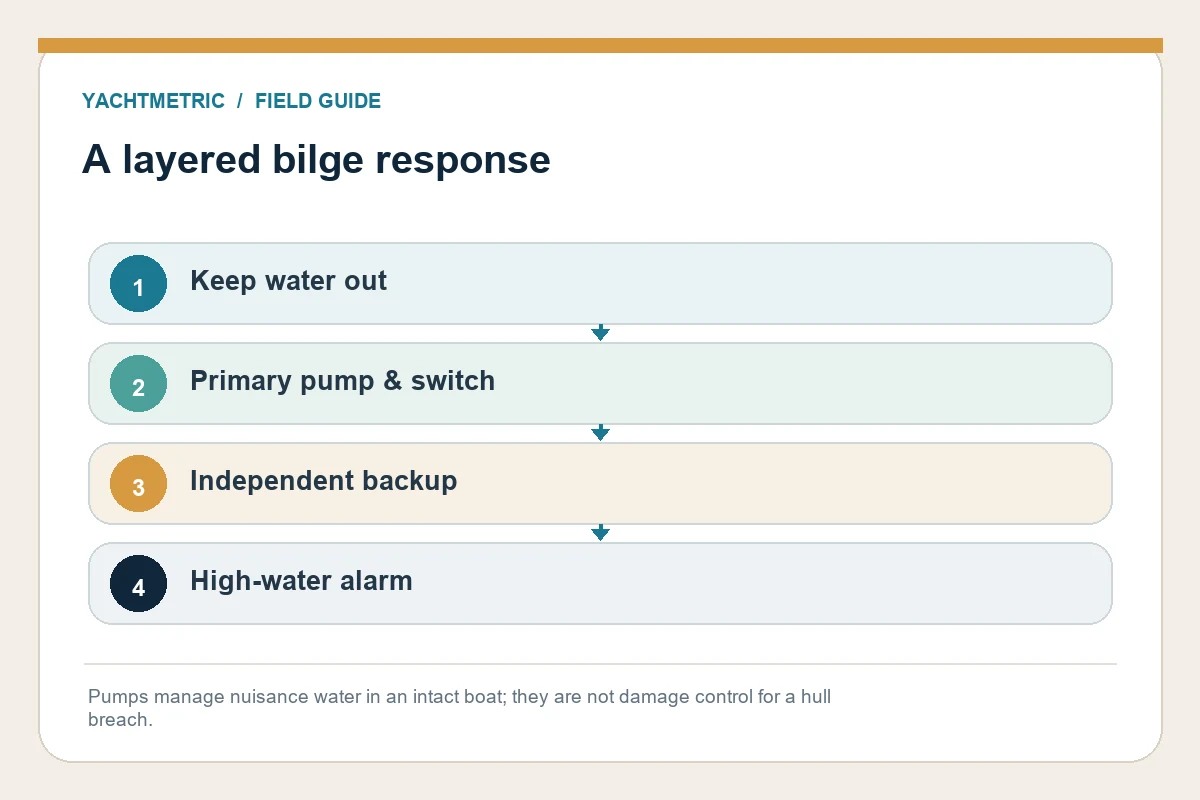
Bilge pumps remove routine accumulated water from a vessel: rain, spray, small seepage, washdown or minor spills. They are not a substitute for finding the source of water, and they are not a damage-control system for a damaged hull. Xylem’s Rule automatic-pump manual makes this limitation explicit for the small-craft systems it covers. A rising bilge level requires investigation and a response plan.
Map the bilge compartments and note low points, bulkheads and any areas that cannot drain to the main sump. A boat with several separated bilges may need more than one pump or alarm location. Confirm whether each pump can be reached for cleaning and whether wiring and hose connections remain accessible after lockers or panels are closed.
Place and size pumps for the real installation
Published flow rates are commonly measured under defined conditions; actual discharge depends on lift height, hose length and diameter, bends, fittings, voltage and outlet location. Choose equipment using the maker’s performance curves and the vessel’s arrangement, not a headline gallons-per-hour number alone. Keep strainers accessible and protect the intake from debris without restricting flow.
The hose route should rise and discharge according to the installation manual, with appropriate support and anti-siphon arrangements where required. Inspect for kinks, crushing, loose clamps and backflow. If the outlet can sit near or below the waterline under heel or loading, have a qualified technician review the arrangement and applicable standards for the exact vessel.
Use automatic switching and a manual test method
An automatic pump depends on a float switch or an integrated sensor that can move or detect water freely. Debris, oil, soap, wiring faults or a poorly placed switch can prevent operation or cause unnecessary cycling. Keep the switch clear of hoses and moving gear. Follow the pump maker’s mounting orientation and electrical diagram; installation details are model-specific.
Rule’s float-switch instructions call for an accessible, level mounting surface, free float movement and protected electrical connections above the highest water level. Its wiring and fuse recommendations are specific to the connected pump. Provide a control that lets the crew identify automatic operation and test the pump manually when safe. Never assume the indicator light alone proves that water is leaving the boat.
Add redundancy and an alarm where appropriate
A backup pump should be independent enough to help if the primary pump, switch or circuit fails. Consider a separate power path, a different activation height and an alarm that warns the crew before water reaches critical equipment. A second pump placed beside the first may not protect another compartment or overcome a shared blocked outlet, so review failure modes rather than simply counting units.
On a vessel with enclosed accommodation, applicable rules or standards may call for audible warning as bilge water approaches a maximum level. Confirm the requirements for the vessel’s size, build and operating area with a qualified marine professional. Keep portable and manual dewatering equipment accessible and ensure everyone aboard knows where it is stored and how to raise the alarm.
Test and log the full path
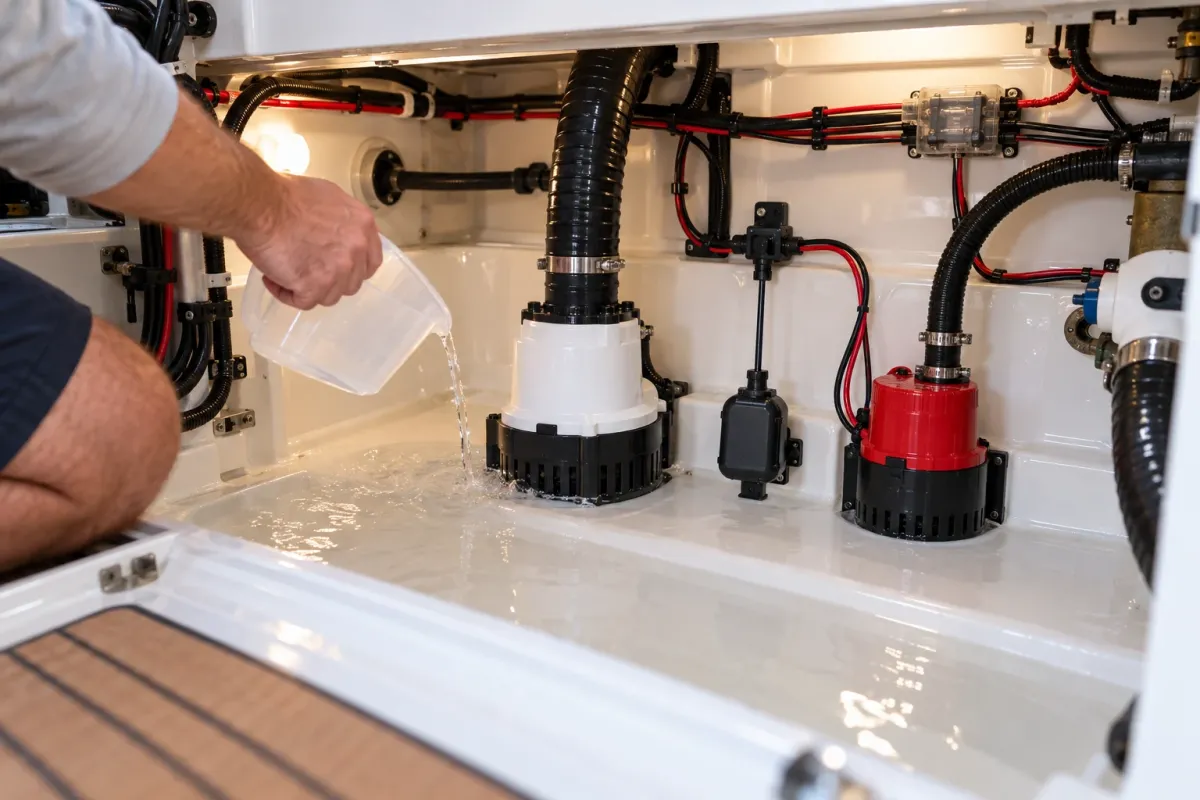
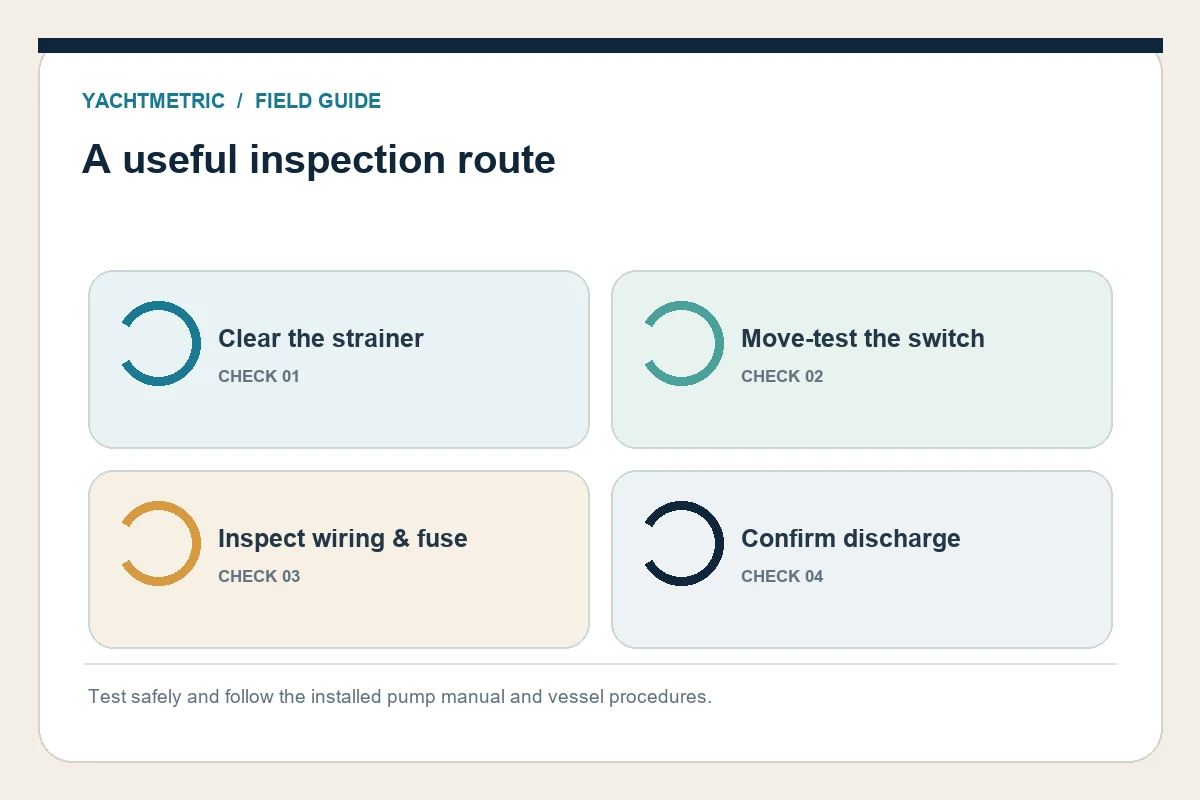
At intervals specified by the manufacturer and before a passage, clear the strainer, inspect the float or sensor, check the fuse and connections, and safely operate the switch. Use a controlled amount of clean water only if the vessel’s procedure permits; protect nearby equipment and avoid introducing water into another compartment. Confirm the pump starts, discharges overboard and stops at the expected level.
Record test date, pump model, switch method, alarm result and any abnormal noise or cycling. Investigate repeated cycling or oily water rather than normalizing it. Bilge water can be contaminated; collect and dispose of it in accordance with local rules. If wiring, through-hull discharge or automatic protection needs repair, use a competent marine technician.
Practical next step
Before acting, identify the exact yacht, installed equipment and operating area. Gather its manuals, service records and a few clear installation photos, then ask a qualified supplier or technician to confirm the details that apply to that vessel. Keep the answer and any test results with the yacht’s maintenance records.